The purpose of these first four posts was to create a page that looks like 5 (or 10) pages but is actually only one page switching out the images, text and audio. That makes it easier to maintain a game with 200 pages than 1,600.
These four pages are the “story” part of the activity.
After this, we’ll move into the math problems and getting things for the farm.
After we have run through all of these parts separately, I’ll show you how to put them together for a more complex, way cooler program.
That’s how I always write code. Make it very simple and working, then make it more efficient.
If you follow this whole series you will be a pretty proficient javascript programmer by the end.
All right, here is the HTML and CSS
<!DOCTYPE html>
<html lang="en">
<head>
  <style>

    #sceneimg{position:absolute;
        bottom: 160px;}
#container {background-image: url("barn_art/background.jpg") ;}


</style>
</head>
As you can see, the css is contained in the head tag, before the body. The element with the id ‘sceneimg’ is placed 160px from the bottom. This gives her initial position, but as you saw in the third post, she moves around. This isn’t true animation. That will come up in other posts in this series.
The element with the id of ‘container’ is the div containing the images and text. This div has a background image which is the barnyard scene. Using a background image is one super-duper easy way of having layered images. You can have this image in the background and items all around the barnyard moved around however you like using css.
And that’s it for the css specific to this page. Now, sad fact, if you copied and pasted the code exactly below, it would not look like my example.
 The stylesheet linked to this page:
<link href="barn.css" rel="stylesheet" type="text/css" />
.. has styles that are used over and over. These include the font used, background image for the body, location of the element with the id “next”, the background of the next arrow turning black when you hover over it and much more. We’ll cover style sheets in another post.
As you can see, once we covered the script, the actual html for this page is really short, just a body tag, a div tag with an id of container, an img tag with an id of ‘sceneimg’ , a div with an id of ‘scenetext’ , a span inside that with an id of ‘words’ , another image with an id of ‘next’ and an audio element with an id of ‘audio1’.
NOTICE THAT ALL OF THESE IDS ARE REFERENCED IN EITHER THE CODE OR CSS. A common mistake novice programmers make is changing the id to something more ‘descriptive’ or original, or deleting it altogether if it seems unnecessary.
<body>
<div id="container">
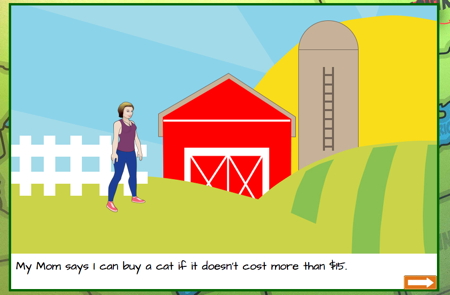
<img id="sceneimg" src ="barn_art/brinley_front.png" alt="girl in tank top" />
<div id="scenetext">
<span id="words"> Hi, I'm Angie's friend, Brinley.
She said you could help me buy some farm animals.</span>
</div>
<img id="next" src="barn_art/next_orange.png" alt="arrow pointing right" />
</div>
<audio autoplay>
<source id="audio1" type="audio/mpeg">
</audio>
</body>
</html>
Since sceneimg, scenetext, words, etc. are all referenced by that id in the code above (above in the program, shown in previous posts on changing the audio and switching scenes and on changing the scene elements , if you change the ID or delete it, the code won’t work. Sometimes, you may not see an id referenced anywhere in the code or CSS on a page but it is required for CSS or Javascript in an external link. In short, don’t delete or change anything in a program without testing it to see if it still works as expected.
Come back next time for a dive into
This is so Awesome! Thank you for sharing this series. I am teaching myself at home how to do this. I find this series very helpful. Please don’t take these lessons down.
,