If you missed the first four posts in this series, you can find them here:
Part 3 – Firing up the world master
Part 4 – Permission to make games
Woo-hoo you have opened up the weltmeister and you see – nothing.
There is just a black screen and a white box next to the word Entities. That’s a lot of help. Clicking on new does nothing. What now?
The reason that clicking on New does nothing is that the weltmeister opens with a new level by default. Think of it like a new, blank document opening by default in the old versions of Microsoft Word.
At the very top, at the left, is the word Layers , kind of in grey. Click the + sign next to it and you will see a new layer and a bunch of stuff drops down at right. You’ll also see a small white box at the left. This box is the size of your layer IN TILE UNITS. So, if you double the size of the tiles, as is my case, from the default of 8 to 16, it will quadruple the area (because area = length x width and both length and width are doubled in size. See how we get math in everywhere?)
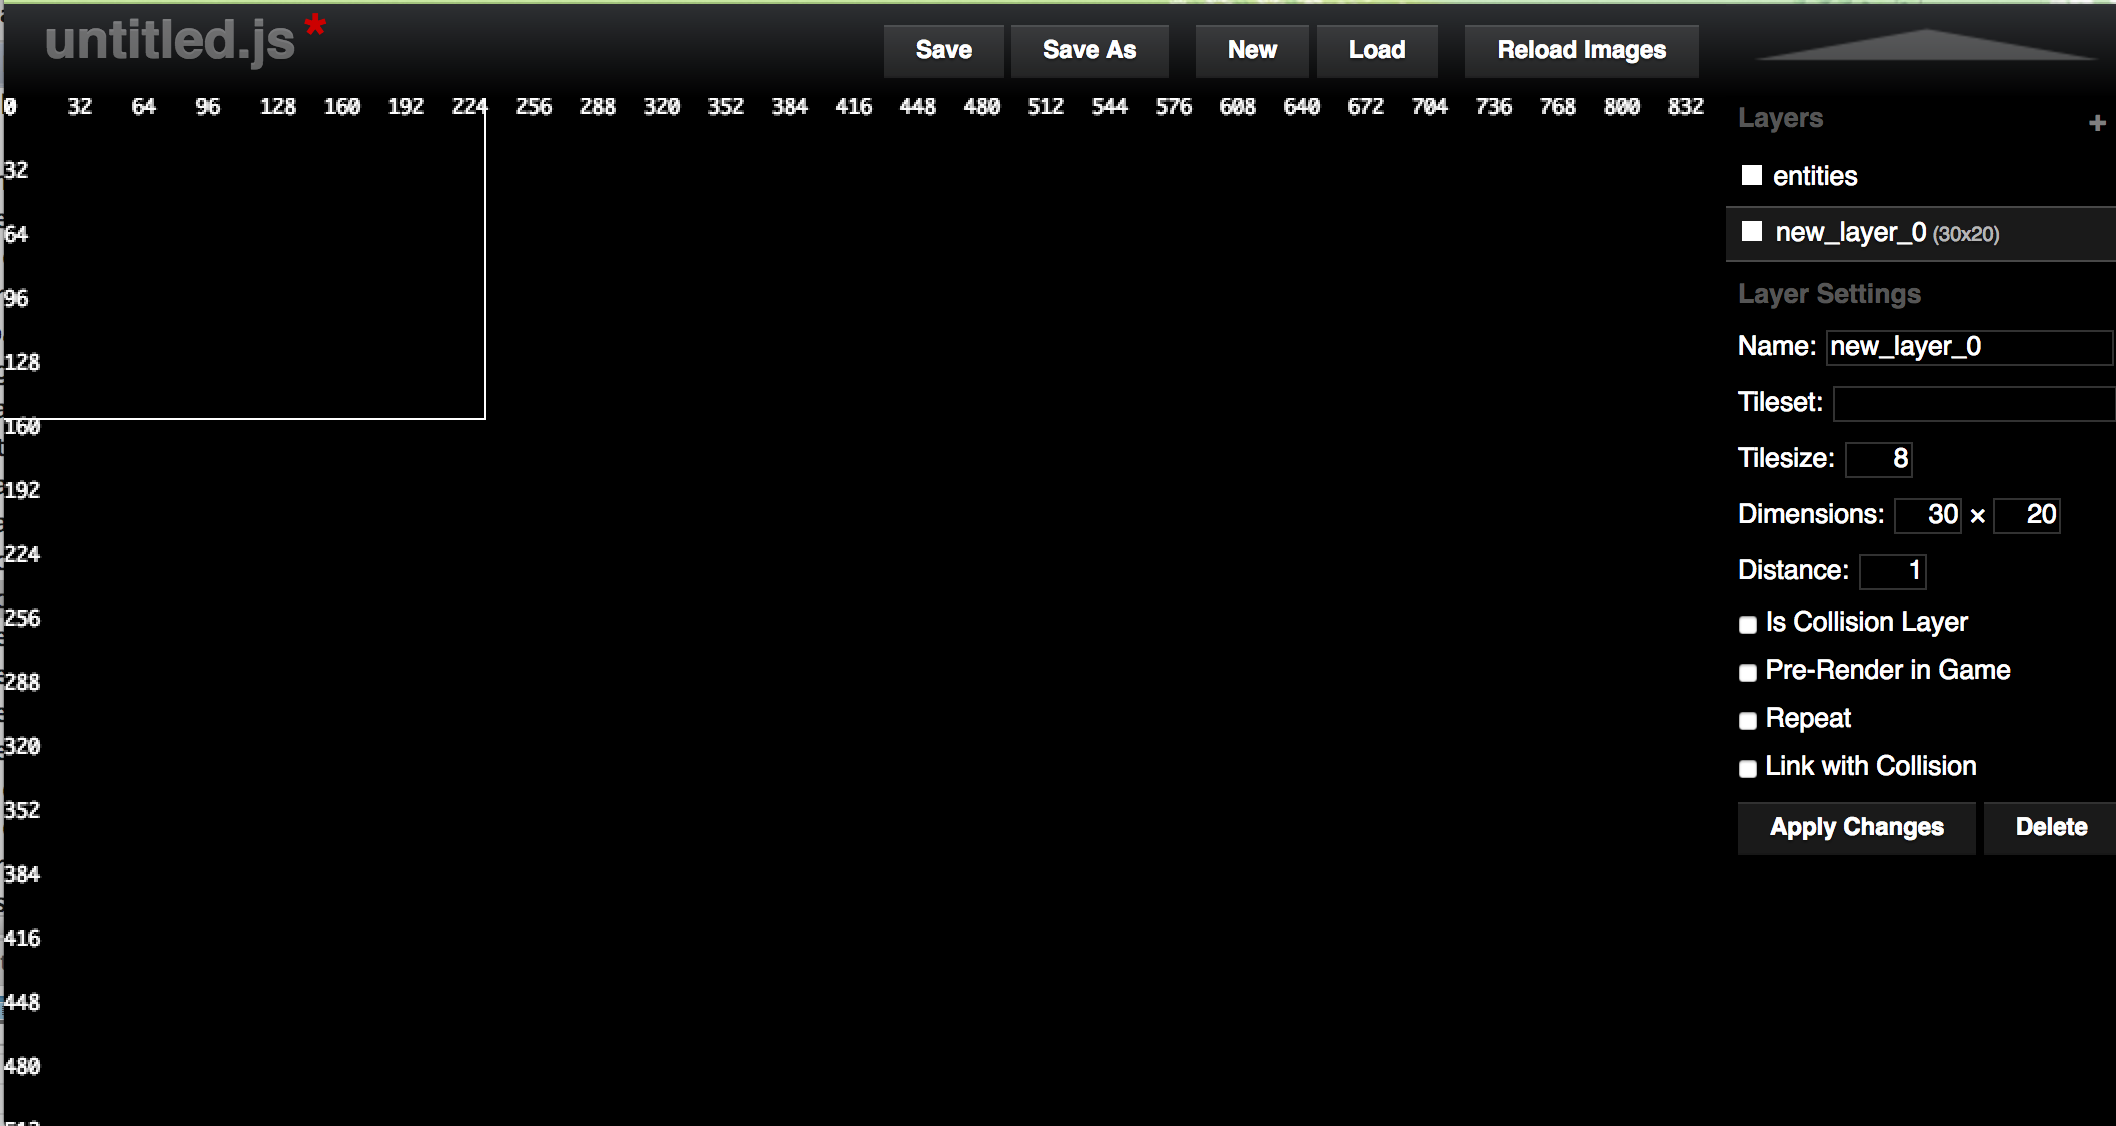
You can also increase the number of tiles for length and width. Just change the numbers in the box at right. In my case, I wanted 55 by 40 tiles, which will give me game screen size of 880 by 640. Click the Apply Changes button on the right to (duh) apply your changes and not that square is a whole lot bigger.
By default, your layers are named new_layer_0, new_layer_1 and so on. It’s aw wise idea to name it something you will remember. This one is going to be the grass so I name it ‘grass’. Now, I need some grass.
Click inside the box at right that says “tileset”. A list of directories should drop down. Select “media” , which is where you stored your artwork. A list of file names should drop down. Click grass.jpg (or whatever you named your file). I will give a discussion of file types and sizes another time. Just let me say that jpg files are smaller so if I have something that is in the background and doesn’t move, it can be jpg. Things that need a transparent layer, I make png.
Okay, you did everything I said and nothing happened. It looks the same. Just black with a white outline.
Click Apply Changes.
Apply changes is kind of like the “Mother May I” or “Simon Says” or impact.js . If you have never played either of those games, you had a deprived childhood.
If you did all of that and nothing happened, try clicking the space bar.

Now, you should see something like the image above. If you look closely, you’ll see a box that denotes a tile OUTSIDE of the tile sheet. Click inside the tile sheet. With one like this, it doesn’t matter where. It is just a solid green box that does the grass.
Now, click inside your game area (that big white square). You’ll see a green box where a tile was painted. Hurray! You can hold down the mouse and drag, or click on the mouse pad and drag on your laptop, to paint wherever you want green to be.
Now, I repeat these steps to add a new sky layer. (If I had both blue and green tiles in my first tile set, I could have done this as all one layer, but I didn’t. Tough.)
We are finally making some progress, just a little. Here is our background.
 Pretty plain so far. In the next post we will add some bushes and trees.
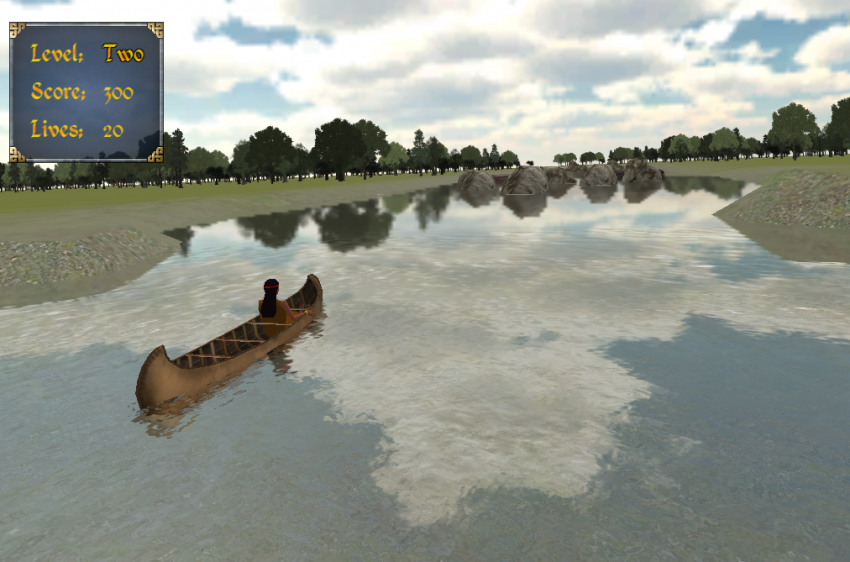
If this is just the intermission between levels we’re working on. Imagine how cool the whole Fish Lake game is? Available for Mac and Windows